Easy Pictures to Draw Set It Off Logo
Logos are quite the paradox, if you think about it: they are nothing more than a simple little mark, but at the same time they are insanely complex through the significance and symbolism they carry. And this is what makes logo design and logo sketching so exciting!
There is just something so intriguing about logos: how does a simple letterform or icon carry so much meaning, energy and emotion? How does a logo designer know that *this* type of imagery works better than the slightly different one? Weren't there other options to consider? How did the designer decide on these particular shapes? The short answer is: through lots and lots of research and logo sketching.

And this brings us to what we are going to talk about in this article: logo sketching! But isn't sketching something basic, you might ask? Why would it need its own article? Well, logo sketching is a lot more complex than one would think. Infinitely fun, but complex and extremely important.
You see, the steps you take before diving in and actually designing the logo are the most important ones, as they provide you with the proper direction and won't leave you wandering around in the dark. The logo sketching phase is a universe where anything is possible and every idea starts coming to life.
Preparing for the logo sketching process
—
Ok, you might have gotten hyped up about sketching but that actually isn't the very first step in the process of designing a logo—or in the process of designing anything, for that matter.
Get to know the types of logos
Familiarity with all the different types of logos that exist means you can pick the one that best fits the project. A certain business might benefit from having an icon, while another would go a long way with a strong wordmark—sometimes it needs a combination of the two.
Usability must be prioritized when it comes to designing a logo. How and where will the logo be used? Will it ever need different iterations of the same logo for different materials? Can you extract an element from the wordmark to be used as a standalone icon/avatar? Is there a specific story behind the brand that can be represented by a symbol?
Take a look at this article on the different types of logos that nicely explains all there is to know to help you in making the right decision.
Debriefing with clients
As a designer, you have to be a master of communication. Induce productive conversations with your clients and send them a proper brief you have previously created for yourself or have a meeting together to settle all the details. In both cases, your job here is to ask every question you might have about the business—its story, visions, goals and aesthetic. This might take a while, as some clients have no idea what exactly they want. But it's your job to try and figure it out by asking the right questions.
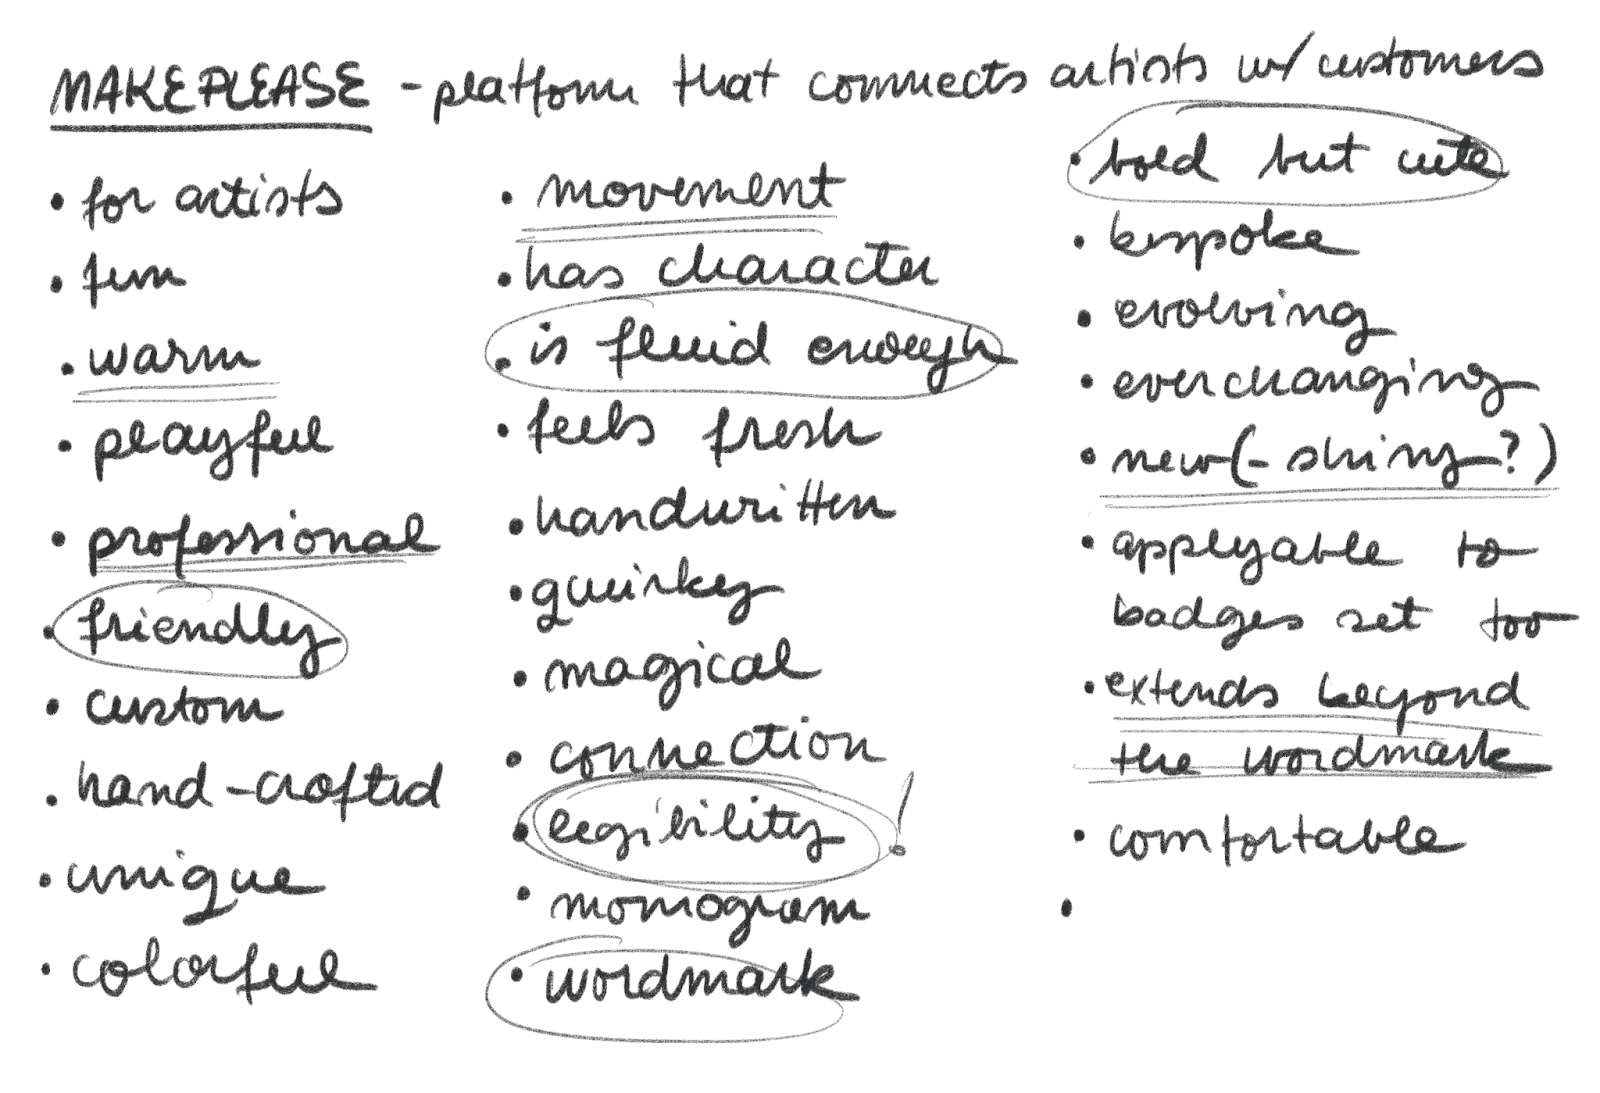
If you did this correctly and paid attention to what the client was talking about, you now should be able to make a pretty long list of keywords describing the brand, which will guide you as you start sketching. This list is only for you to use, so don't focus on making it pretty. Just simply write down everything that crosses your mind when thinking about the project.
Research before logo sketching
Now we get to the fun bit: mood boards! These will rely heavily on the keyword list you've just created and, depending on how many directions you decided on with your clients, you will create 1 or 2 of them.
If you're not sure what a mood board is and you need help with conceptualising it, a mood board is a collection of images that clearly show a graphic direction. You can include images of pretty much anything here: people, colors, plants, interior design, logos, illustrations, patterns, books, etc. Anything that has the style of the direction you want to show. There are plenty of places to look for such images and references: from Google Images, Pinterest, Design Inspiration or Unsplash, to books or even your own camera roll.
Just keep an open mind and have a sharp eye for detail as this research will actually help you immensely in properly defining a visual direction to follow.

Clear your head
I know at this point it is pretty easy to get lost in all those images and thoughts. It's tempting to go towards a new direction every 15 minutes, as soon as a new slightly different image appears in front of us.
Stay. Focused.
Choose 1 or 2 clear directions to follow and stick with those. You will see that there will still be plenty of room to explore even within those limitations.
Pro tips on the logo sketching mindset
—
1. Choose the medium you are the most comfortable with
Sketching is all about exploring and having fun, so you need to do it with tools that you can have fun with. If you are trying to figure out how a certain app or program works, that takes away the focus from sketching.
You can go for the classic pen and paper. Or maybe your go-to medium is Procreate on the iPad. Maybe a Wacom tablet and Photoshop? Whichever it might be, make sure you are familiar enough with it so that you'll only have to focus on sketching, not the tool itself.
2. There is no right or wrong way to sketch
Another cool thing about logo sketching is that there isn't just one way to do it. Every creative has their way of sketching and none is better than the other.
However, there might be techniques that best suit your style and workflow, but you can only find that out by exploring a lot. You might have a really messy sketchbook, while all your colleagues keep theirs nice and clean. Or you might want to rapidly jump from one sketch to another, while your mates take their time on one before moving on.
Don't get intimidated or demotivated if others have a different process than you. Each of us is unique and so are our processes. But let's go through some of these sketching techniques and recommendations.

3. Don't get lost in the details
Sketching is all about exploring different styles and directions. At this point you should focus only on the overall, rough shape of the logo. Getting stuck on a single version and starting to polish that one might be a huge waste of time, as that version might not even be the best choice. You will have plenty of time to focus on the details in the next stage!
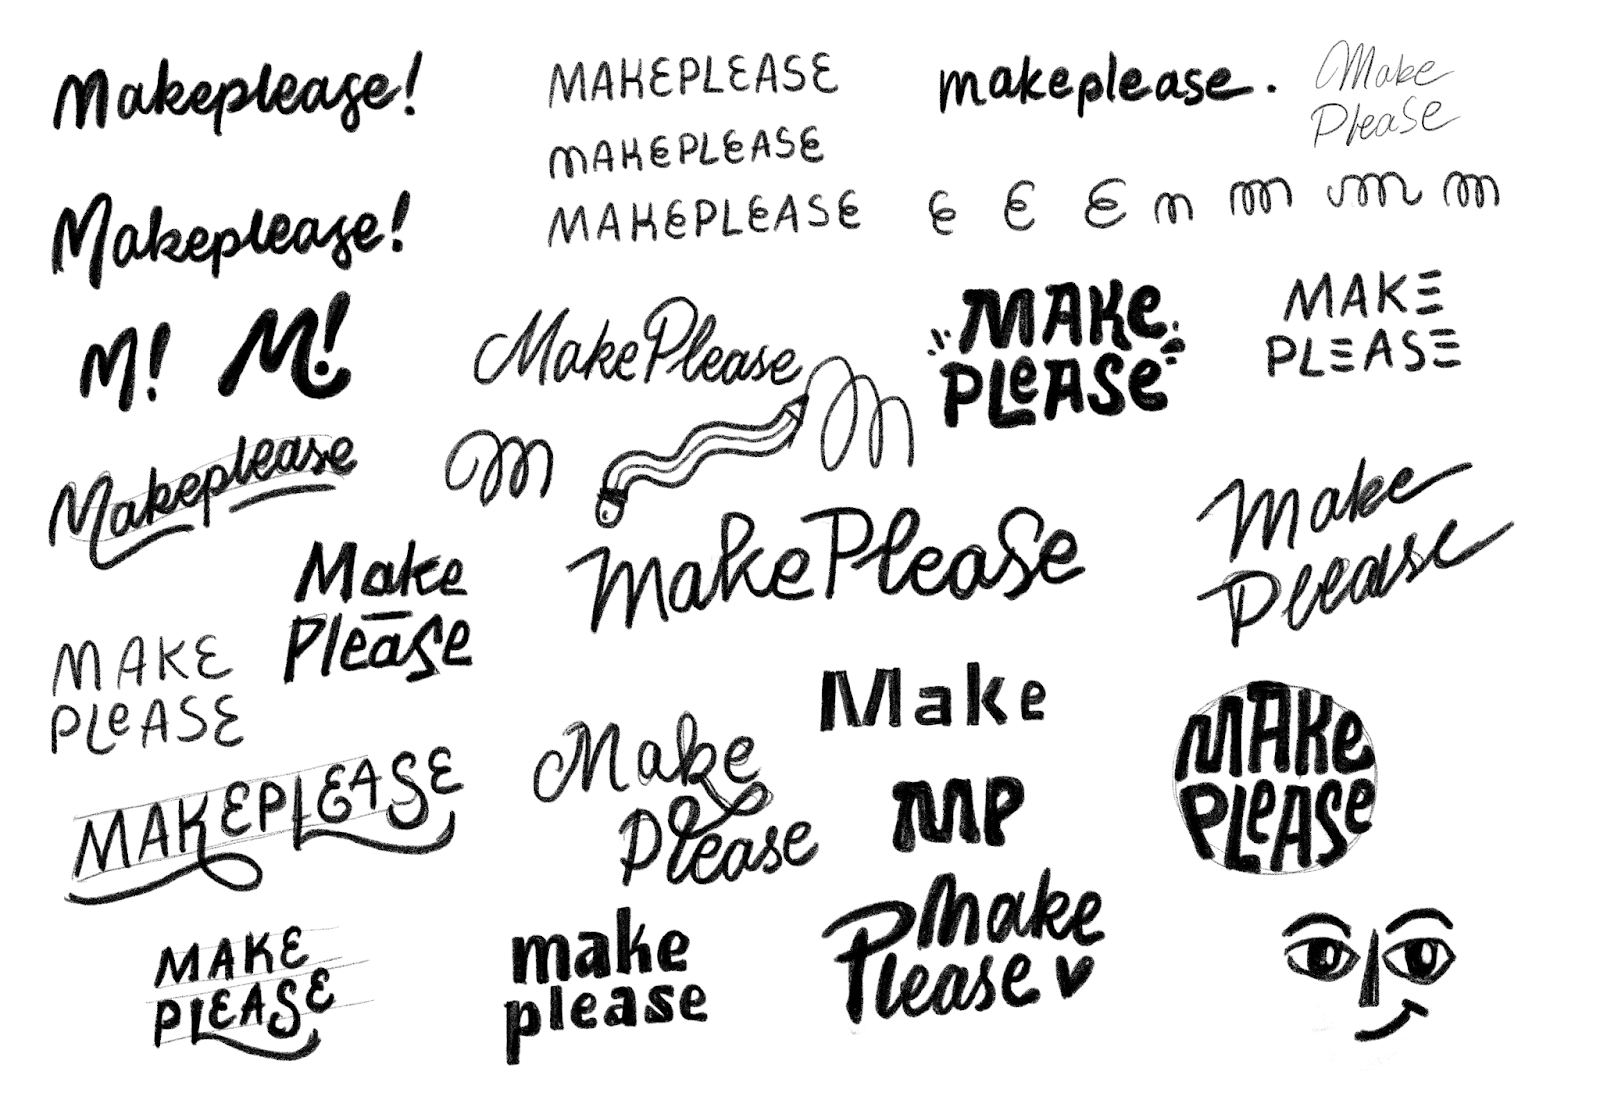
4. Sketch fast
As I just mentioned, the best way to not get lost in the details is to sketch fast. Not too fast that you mindlessly pass by every version, but fast enough to allow your brain to get all the ideas out. When you explore versions through sketching, your mind tends to jump from one to another… so let it do exactly that.
5. Sketching isn't linear
Speaking of jumping from idea to idea, it's okay to leave a sketch unfinished if a new idea comes up. You can always come back to it later. Feel free to take steps forward and back, to go left and then right and back again. Don't set yourself boundaries, but rather give yourself full freedom to explore.
6. Be messy
One of the most common fears in the creative community is the fear of having a messy sketchbook. But guess what? Sketchbooks (or Photoshop or Procreate files) are supposed to be messy and to make no sense.
My theory is that the messier the sketchbook is, the clearer the end result will be. The human mind is super abstract and if you give it the necessary freedom to make a mess, it'll eventually find clarity. Your sketchbook is yours alone, so don't worry if it's chaotic!
7. Don't work with colors yet
I know, colors are pretty. I love them too. But sketching and introducing color at the same time is really a rather unproductive way to do things.
You see, when you start introducing colors you are actually giving your brain an extra layer of information to deal with. Whereas at this point you should be focusing on one thing only: the overall style and shape of the logo. Color has so much power, and with that power it will certainly steal your focus. You'll have a whole step later on in the process to deal solely with colors.
8. Criticise your work
Learn to be your own critic. Try to look at your sketches objectively. Refer back to your keyword list and see which sketch matches it and which one doesn't.
Look at your sketches from a technical point of view. Ask yourself: which sketch best matches the project at hand and why? Which one doesn't and why? Which logotype is the most legible and which one is the least legible? If you were to finalise these sketches, would they all work at small sizes? Do they make sense for this particular project? Are they anatomically correct?

9. It's not about what you personally like
Sure, at the end of the day everything you design will be filtered through your own preferences. But try to detach yourself from the versions you like the most and find the versions that make sense for the project. Try to put yourself in your client's (and their audience's) shoes. What would they like?
Choosing and finalising your logo sketches
—
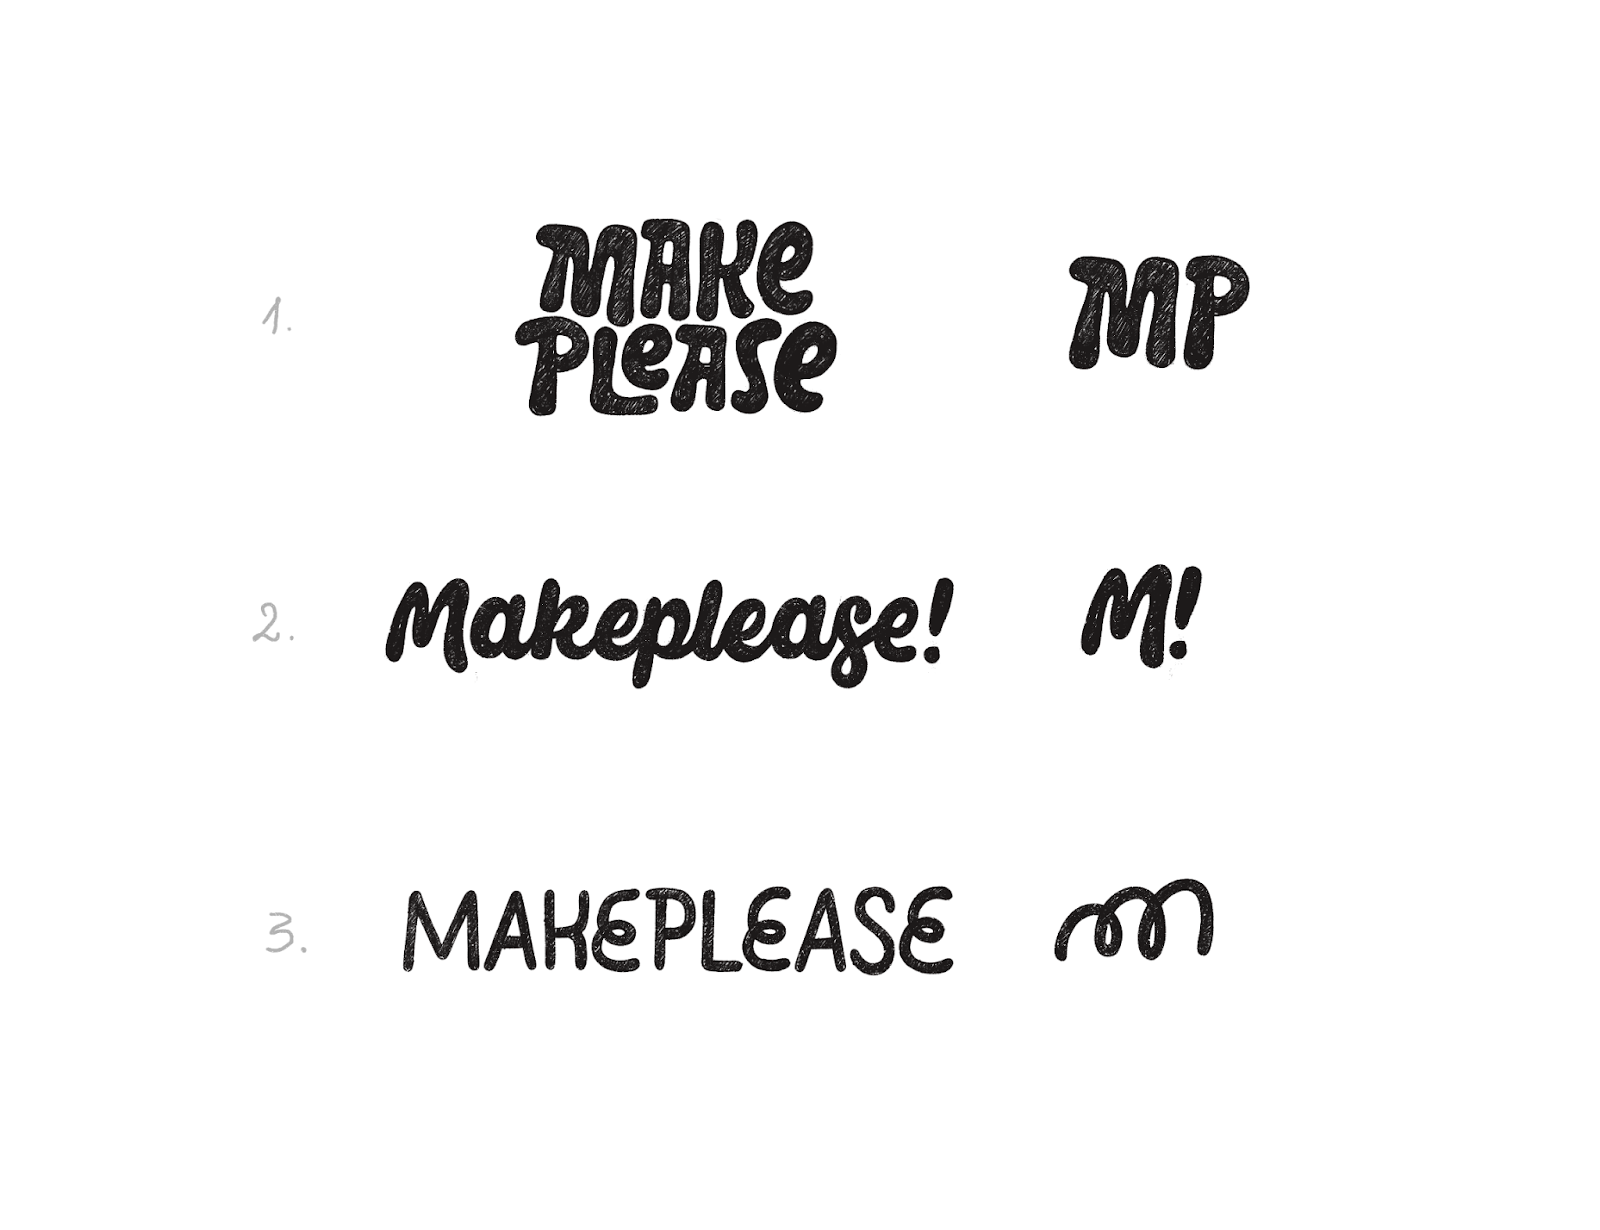
Choose up to 3 sketches
The number of presented sketches usually varies from contract to contract, but 3 is usually the magic number. You can go higher but, in an ideal world, that would mean extra cost. Whatever number you agree on with the client, make sure it's clearly stated in the contract or agreement, to avoid extra unpaid work.
With the brand's requirements and needs in mind, review all the sketches you created. Select the logo sketches that best fit the objective of the project based on your brief, keywords and research.
Make the sketch presentable
Remember that at this point you are only presenting a sketch. However, you have to know that not every client has the ability to look at a rough sketch and see the final result.
So start polishing that sketch: make its outlines smooth, get rid of any major inconsistencies and even out the spacings and grids. You don't have to make everything pixel perfect, you just have to make your sketch close enough to the final result.
At this stage you can still remain in the sketching app you chose, no need to take the sketch to Illustrator just yet—you only want to do that after the sketch gets approved.
Be patient and receptive to feedback
Now it's time to present your logo sketches and gather feedback.
Sometimes we all need some time to process things, so don't rush your client and give them space to spend some time with the sketches. Also, at this point there might be some feedback and revision rounds. Keep an open mind to those revision requests, but be prepared to explain your own work and the decisions you made.
Speaking of revisions, you want to make sure that your number of revision rounds are clearly stated in the contract or agreement. Normally there's around 3 rounds included in the initial price, but this depends quite a lot on the initial budget, type of project and even the nature of the revision: changing a slight curve on a shape is nowhere near drawing an entirely new one, so pay attention to these little details and try to avoid extra free work. Sounds intimidating and scary, but after a few projects you will figure it all out and master the art of revisions.
You're done sketching—what's next?
—
Once you've mastered your logo sketches it's time to turn them into a finished logo file that's ready to use. Learn how by following this tutorial on creating a logo in Adobe Illustrator to turn your sketch into a vector logo.
Sketching a logo is a super fun and, at the same time, a serious process. If you think about it, this is the step that allows for an incredible amount of freedom to play and experiment, yet it will define the result of the whole project. It allows you to connect to your client, to properly collaborate with them and to deliver the concept they are looking for.
Enjoy the process, it's all about playing with shapes and styles. What more could you want?
Want a professional designer to create a logo for you?
Work with our talented designers to make it happen.
brucetheatimandid.blogspot.com
Source: https://99designs.com/blog/logo-branding/logo-sketching/
Post a Comment for "Easy Pictures to Draw Set It Off Logo"